Nginx Proxy Manager Unveiled: A Secure Journey with SSL and Reverse Proxy
Nginx Proxy Manager is a powerful open-source tool designed to simplify the configuration and management of reverse proxy servers. In a world where web applications and services are becoming increasingly complex, Nginx Proxy Manager offers an intuitive and user-friendly interface to efficiently route traffic, manage SSL certificates, and streamline the deployment of web applications.
Installation
The installation process is straightforward, and using Docker Compose allows the service to be deployed within moments.
1
2
3
4
5
6
7
8
9
10
11
12
13
14
15
16
17
18
19
20
21
22
23
24
25
26
27
28
29
30
31
32
33
34
35
36
37
38
39
40
41
42
43
44
45
46
47
48
49
50
51
52
53
54
55
56
57
58
59
60
61
62
63
---
version: '3.8'
services:
  # Nginx Proxy Manager
  nginx-proxy-manager:
    container_name: nginx_proxy_manager
    image: 'jc21/nginx-proxy-manager:latest'
    restart: unless-stopped
    ports:
      - '81:81'
      - '443:443'
    environment:
      DB_MYSQL_HOST: "npm_db"
      DB_MYSQL_PORT: 3306
      DB_MYSQL_USER: "npm"
      DB_MYSQL_PASSWORD: "npm"
      DB_MYSQL_NAME: "npm"
    volumes:
      - nginx-proxy-manager-data:/data
      - nginx-proxy-manager-certs:/etc/letsencrypt
    networks:
      - services

  # Database For NPM
  db:
    container_name: npm_db
    image: 'jc21/mariadb-aria:latest'
    restart: unless-stopped
    environment:
      MYSQL_ROOT_PASSWORD: 'npm'
      MYSQL_DATABASE: 'npm'
      MYSQL_USER: 'npm'
      MYSQL_PASSWORD: 'npm'
    volumes:
      - nginx-proxy-manager-db:/var/lib/mysql
    networks:
      - services

# Docker Networks
networks:
  services:
    driver: bridge

# Docker Volumes
volumes:
  nginx-proxy-manager-data:
    driver: local
    driver_opts:
      type: 'none'
      o: 'bind'
      device: '$VOLUME_PATH/nginx_proxy_manager/npm_data'
  nginx-proxy-manager-db:
    driver: local
    driver_opts:
      type: 'none'
      o: 'bind'
      device: '$VOLUME_PATH/nginx_proxy_manager/npm_db'
  nginx-proxy-manager-certs:
    driver: local
    driver_opts:
      type: 'none'
      o: 'bind'
      device: '$VOLUME_PATH/nginx_proxy_manager/npm_certs'
Getting Started
Deploy Nginx Proxy Manager Service:
Open a terminal, navigate to the directory with
docker-compose.ymlfile, and run the following command to start the containers:1
docker-compose up -dAccess NPM Service:
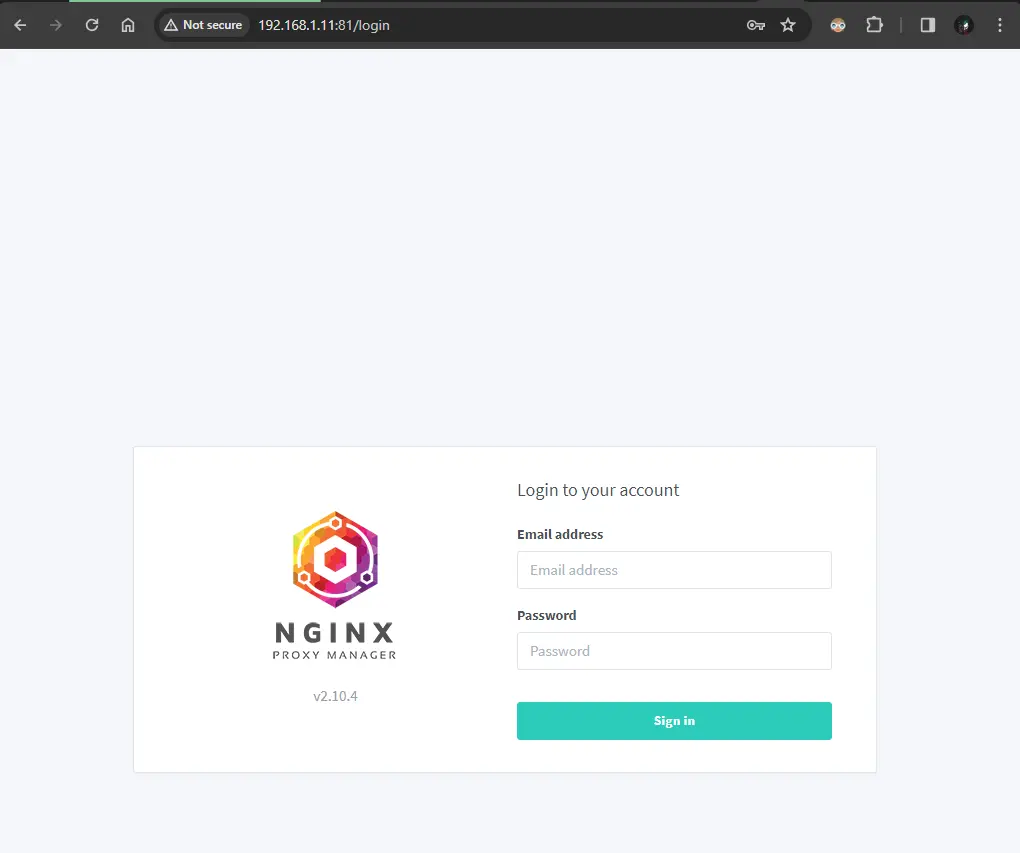
Nginx Proxy Manager should now be accessible at
http://localhost:81orhttps://SERVER_IP.Default Admin User:
1
2
Email:    [email protected]
Password: changeme
Generating the SSL Certificates
When setting up SSL certificates for Nginx Proxy Manager, it’s essential to have a registered domain name. You can obtain a free domain from Duck DNS or purchase a custom one. In my case, I’ll be using a domain from Cloudflare.
DNS Management
Create an A record pointing your domain to the public IP address of your proxy instance. Additionally, establish CNAME records for all subdomains, directing them accordingly.
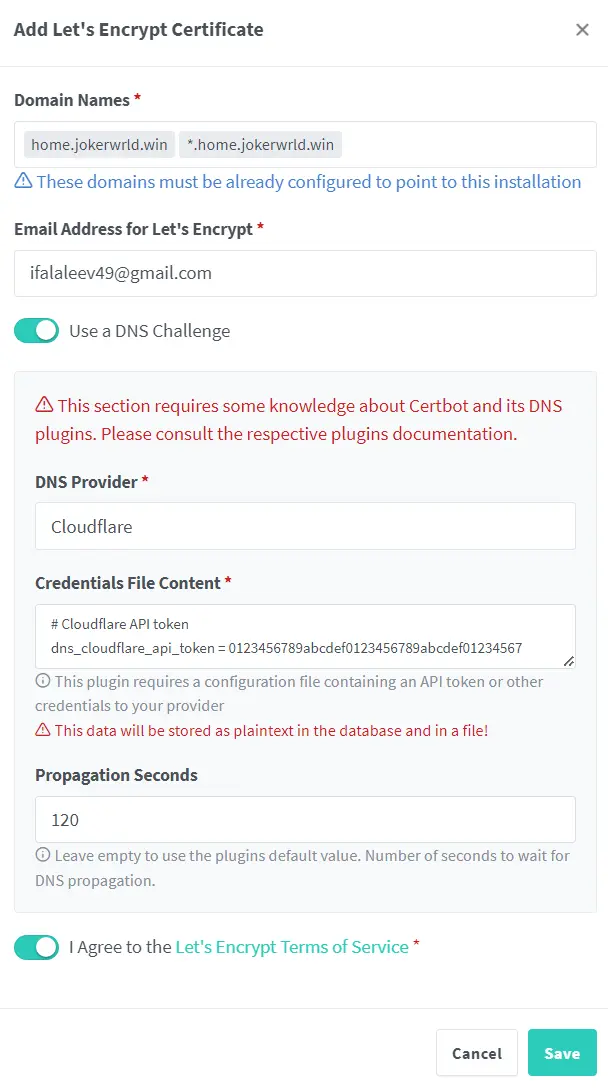
SSL Certificates
In the Nginx Proxy Manager web interface, navigate to the
SSL Certificatestab, and add a new SSL certificate and select the domain for which you created the A record and CNAME records.Nginx Proxy Manager and Let’s Encrypt will automatically handle SSL certificate renewal. Ensure that your Cloudflare settings remain intact to allow the renewal process.
Setting Up Domains
Now we can add our proxy entries.
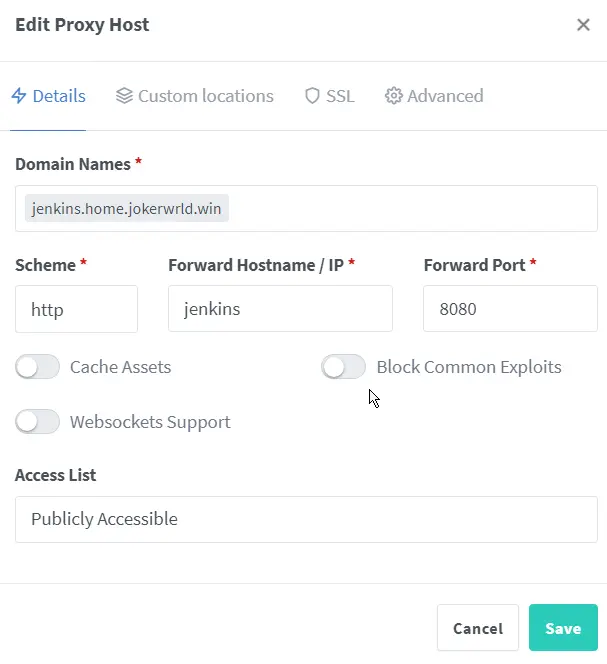
Domain Names
The domain name is going to be our root or sub domain, so
SERVICE_NAME.home.jokerwrld.win.Forward Hostname/IP
In this field we don’t need actually have to put any IP addresses we can just refer to a containers using their names in the
docker-compose.ymlfile.If you want to proxy a non-docker service, or maybe if your service is not on the same Docker network as the Nginx Proxy Manager, you’ll need to put the IP address instead. For example, if your service is running on the same machine as the Nginx Proxy Manager, that will be localhost e.g.
127.0.0.1and also port on which is service running on.Other Options
Depending on the application, you also might want to enable some of these options.
For example, Home Assistant, TrueNAS Scale, and Proxmox uses
Websockets, so you’ll want to enable them in that case.Block Common Exploitsis not that useful, since we’re running our proxy on the local network, behind a firewall and CGNAT.And
Cache Assetsalso doesn’t make much of a difference in speed in my opinion.After that’s done, we can go to the
SSLtab, and choose the SSL certificate that we’ve generated earlier. Also, we’ll enableForce SSlandHTTP/2 Support.
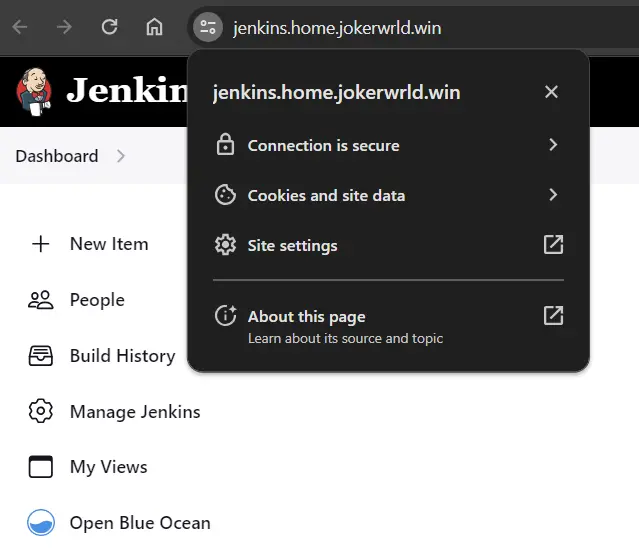
Accessing Local Service
Now we can open the URL. And there you go! A local service running in your home network with a pretty domain name and a valid SSL certificate.
This method relies on the Internet connection to resolve the domains. So if you want your services to work independently of the Internet connection, that’s where you might want to run your own DNS server like Pi-Hole or AdGuard.


